If you’re just getting starting with iconik or just curious about what’s involved to set up your own iconik account, then you’re in the right place.
Here, we’ll walk you through signing up for iconik, then all the way through to collaborating with others on your media.
Once you’ve gone through these steps, you’ll never have to look hard for your content again. You will also find how efficient it can be to work on your media with others.
🏁 You ready?
Here’s a webinar that shows everything in real-time.
Below, you will also find the steps outlined as well as links to the corresponding help docs.
1. Sign Up
To register your account, you just need to set your email and password and add a payment option. If you use an iconik trial link, your account will start with credits ready to use.
2. Add Users
Beyond managing media, iconik is great for collaborating with others on video and other media. To add a user, go into the admin section and choose to add a new user and their details. You can also create a user group that you can easily add users to and know they have the proper rights. They will get an email inviting them to join in the fun.

Go to: Admin/Users/+ New User |
More
3. Customize Metadata Views
Metadata is going to add more searchability and utility to your media. There’s no limit to how you can use this.
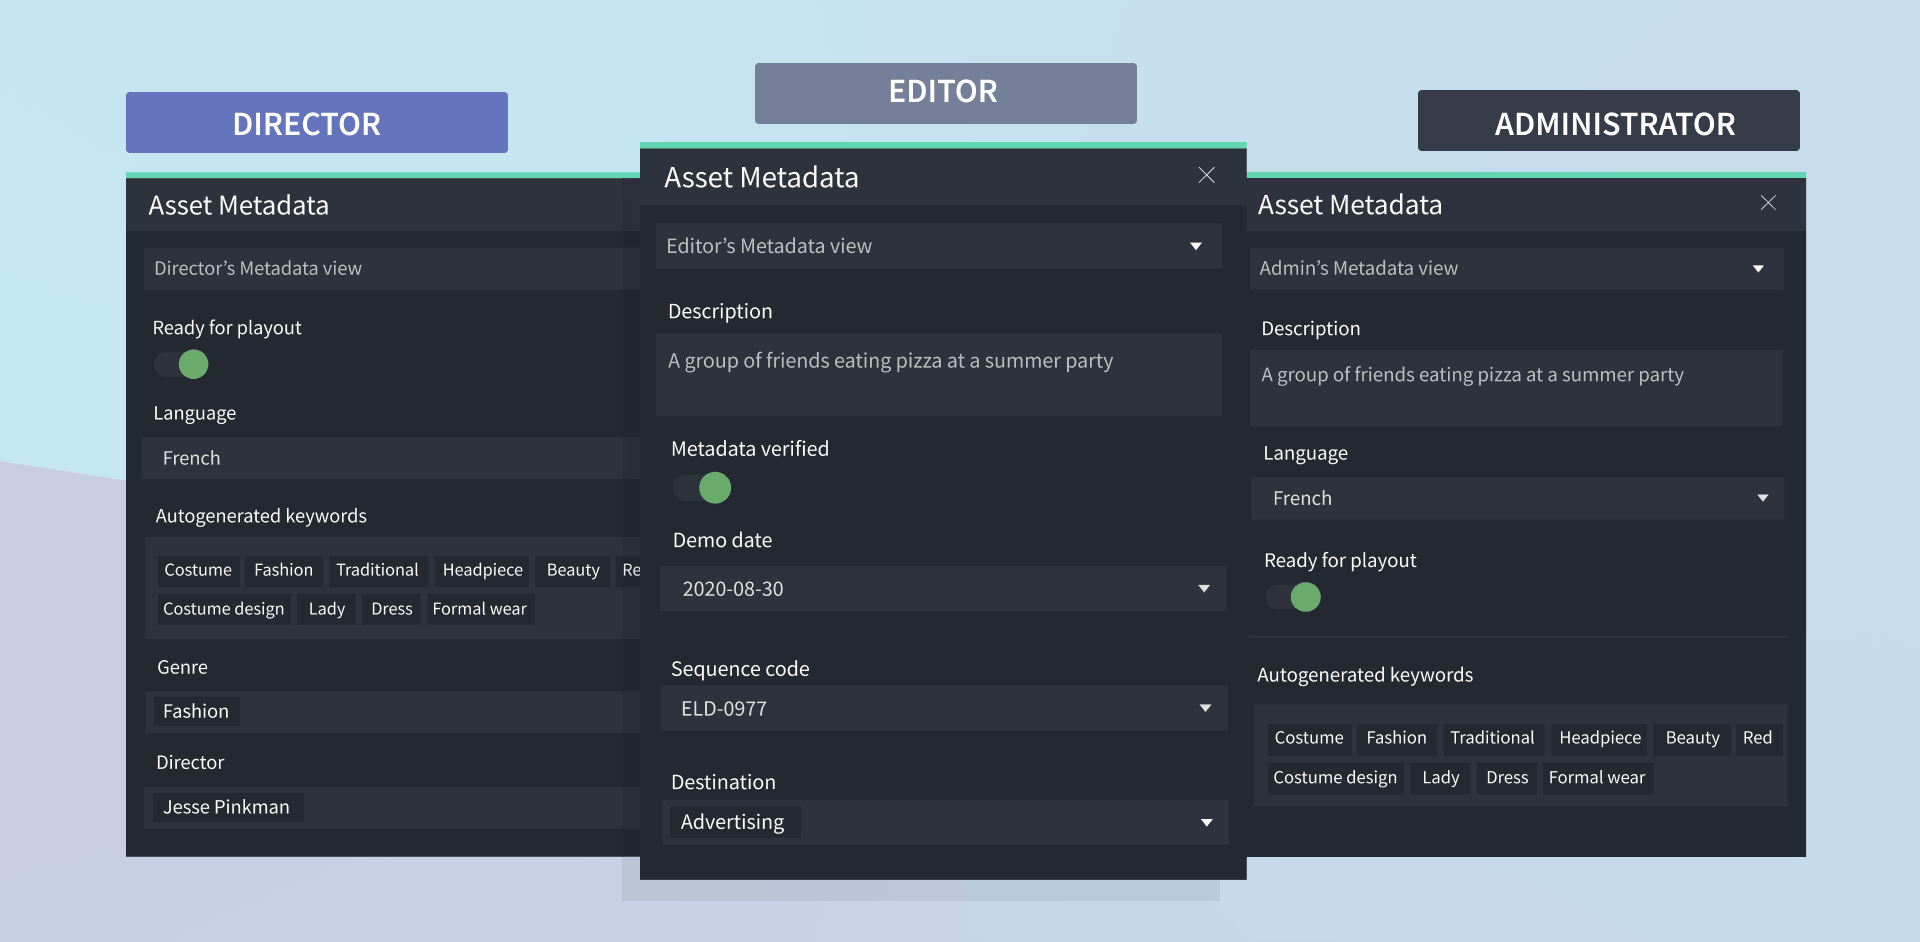
To finish, just add a name and an optional description, then click “create”. Next, you’ll be sent to the metadata view editor where you can add and customize fields, rearrange them, and even make some fields mandatory for new content.
Go to: Admin/Metadata/Views/+ New Metadata View |
More
4. Connect Your Cloud Storage
Now you are about to see the power of iconik. Connecting a cloud bucket will quickly add your content into iconik. Unless you choose otherwise, this will not copy your hi-res assets. Instead, iconik creates and stores low-res proxy versions and keyframes to represent it within iconik.
Go to: Admin/Storages/+ New Storage |
More
Add a storage name and purpose, then you will move onto fill in the details to connect to your storage. Click “Create” and watch your content begin to fill iconik.
5. Connect Your On-Premise Storage
The iconik Storage Gateway (ISG) allows you to use your on-premise storage with iconik in the cloud. This will allow iconik to sync your folder structures from your local SAN, NAS or personal computer. It gets synced to the cloud either by using fast parallel original file uploads or with local transcoding to only upload proxies and keyframes. Learn how to install the ISG on your system here
6. Add Metadata to Your Content
Now you’re ready to experience the real benefit of media management.
- Manually add tags and metadata by either right-clicking on media in the search (grid) view to update the data for a single or multiple assets.
- Analyze content with visual AI to add detailed, time-based tags automatically
- Use AI to transcribe your content and gain the ability to search for spoken phrases
- Grouping together similar assets
- Collecting Assets for a particular use-case
- Using ACLs to share a group of assets among a User-Group
- With iconik Storage Gateway you can map your folders on your computer to a collection in iconik
- Go check out the iconik API and explore integrations
- or start working with the iconik panel for Adobe to see how much faster you can create
- Posted in:
- iconik
7. Organize Items Into a Collection
Collections allow you to group assets and collections. You can also define who is allowed to view or use the collection. Unlike a folder or directory on your computer, an asset in iconik can live in multiple collections at the same time.
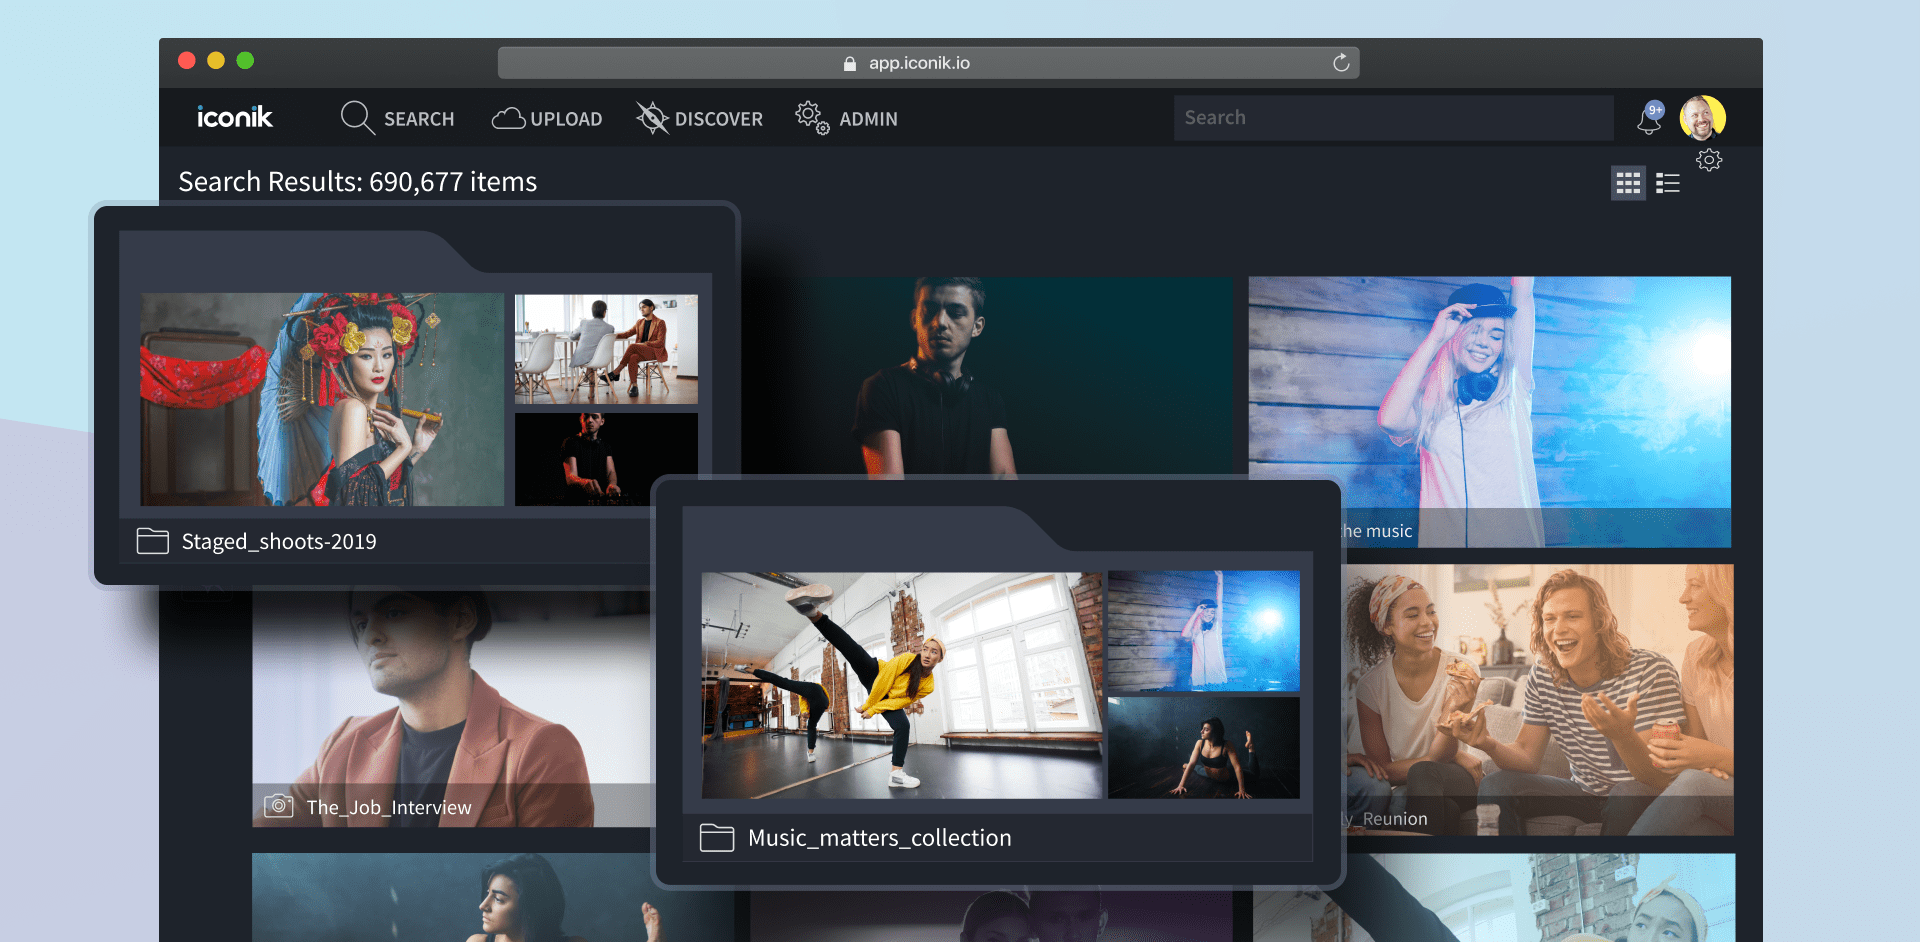
Some Use Cases for Collections:
8. Start Collaborating
iconik is great for collaborating, especially with video. Now that you have your media in iconik and the structure has started to take shape, you may want to invite others to manage and create with you.
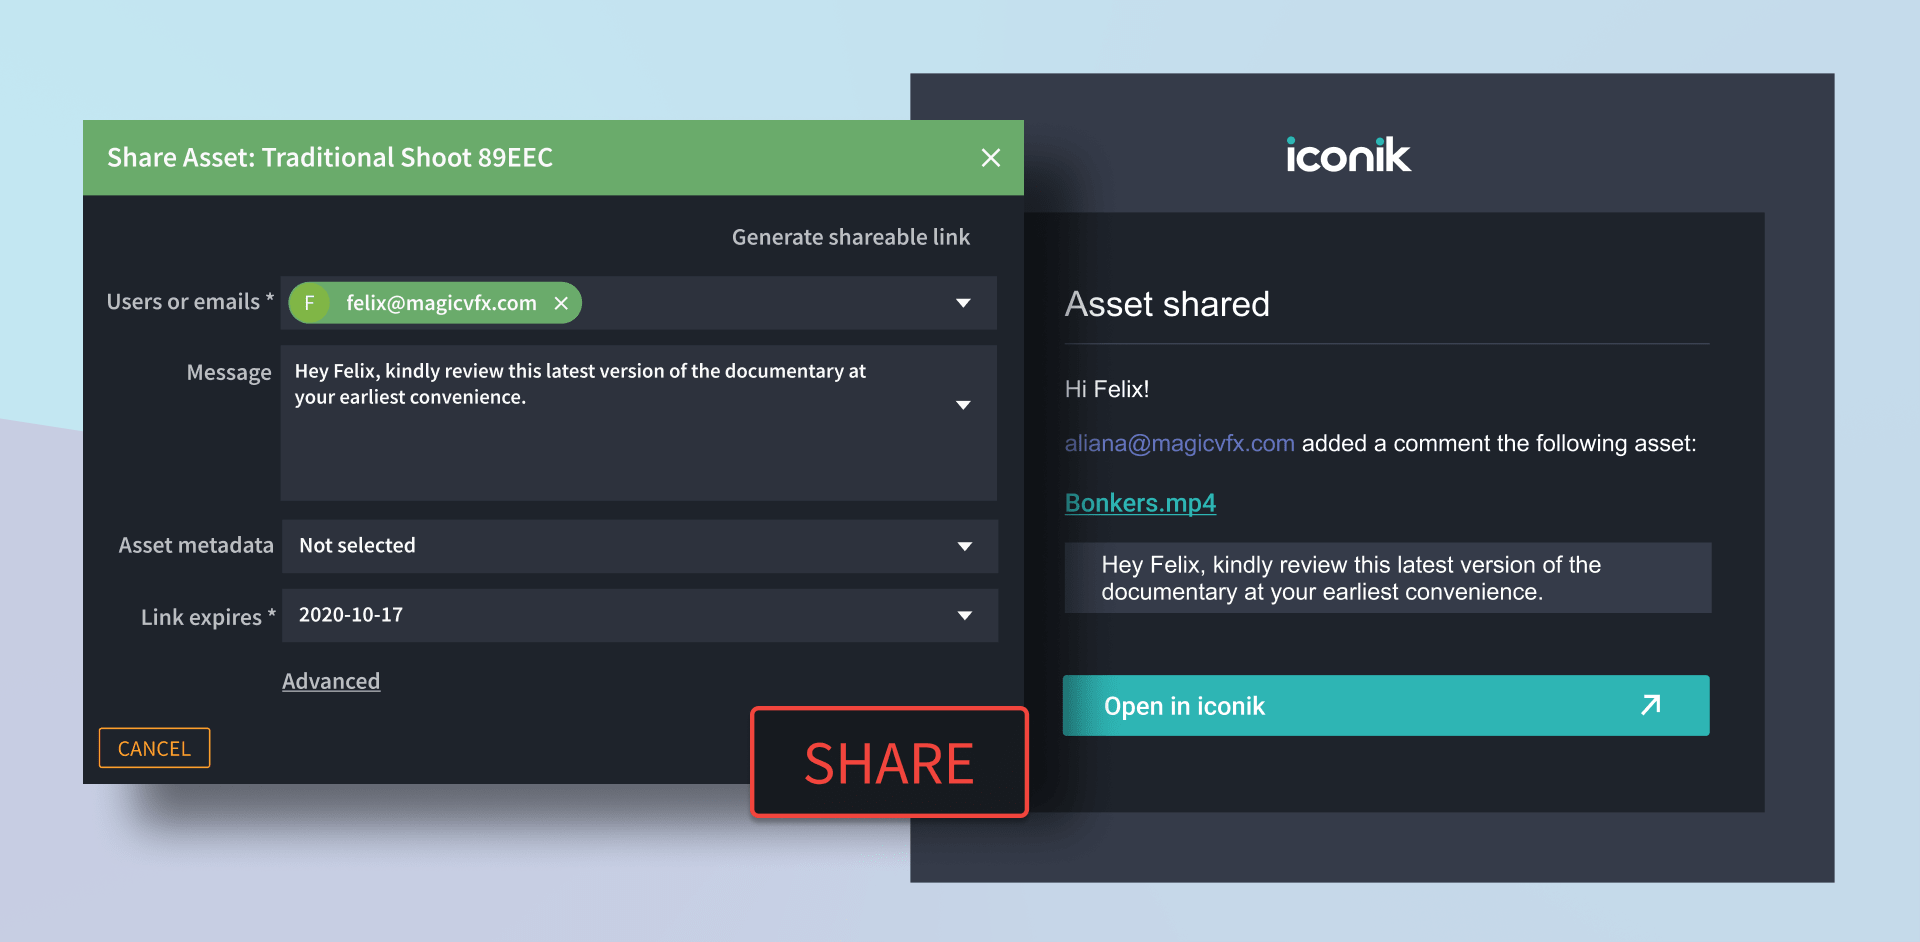
Share Assets
You can share multiple assets at once, as well as share entire collections. Once you open the share window, just type in an email or user name, add a message, and define the rights of the share.
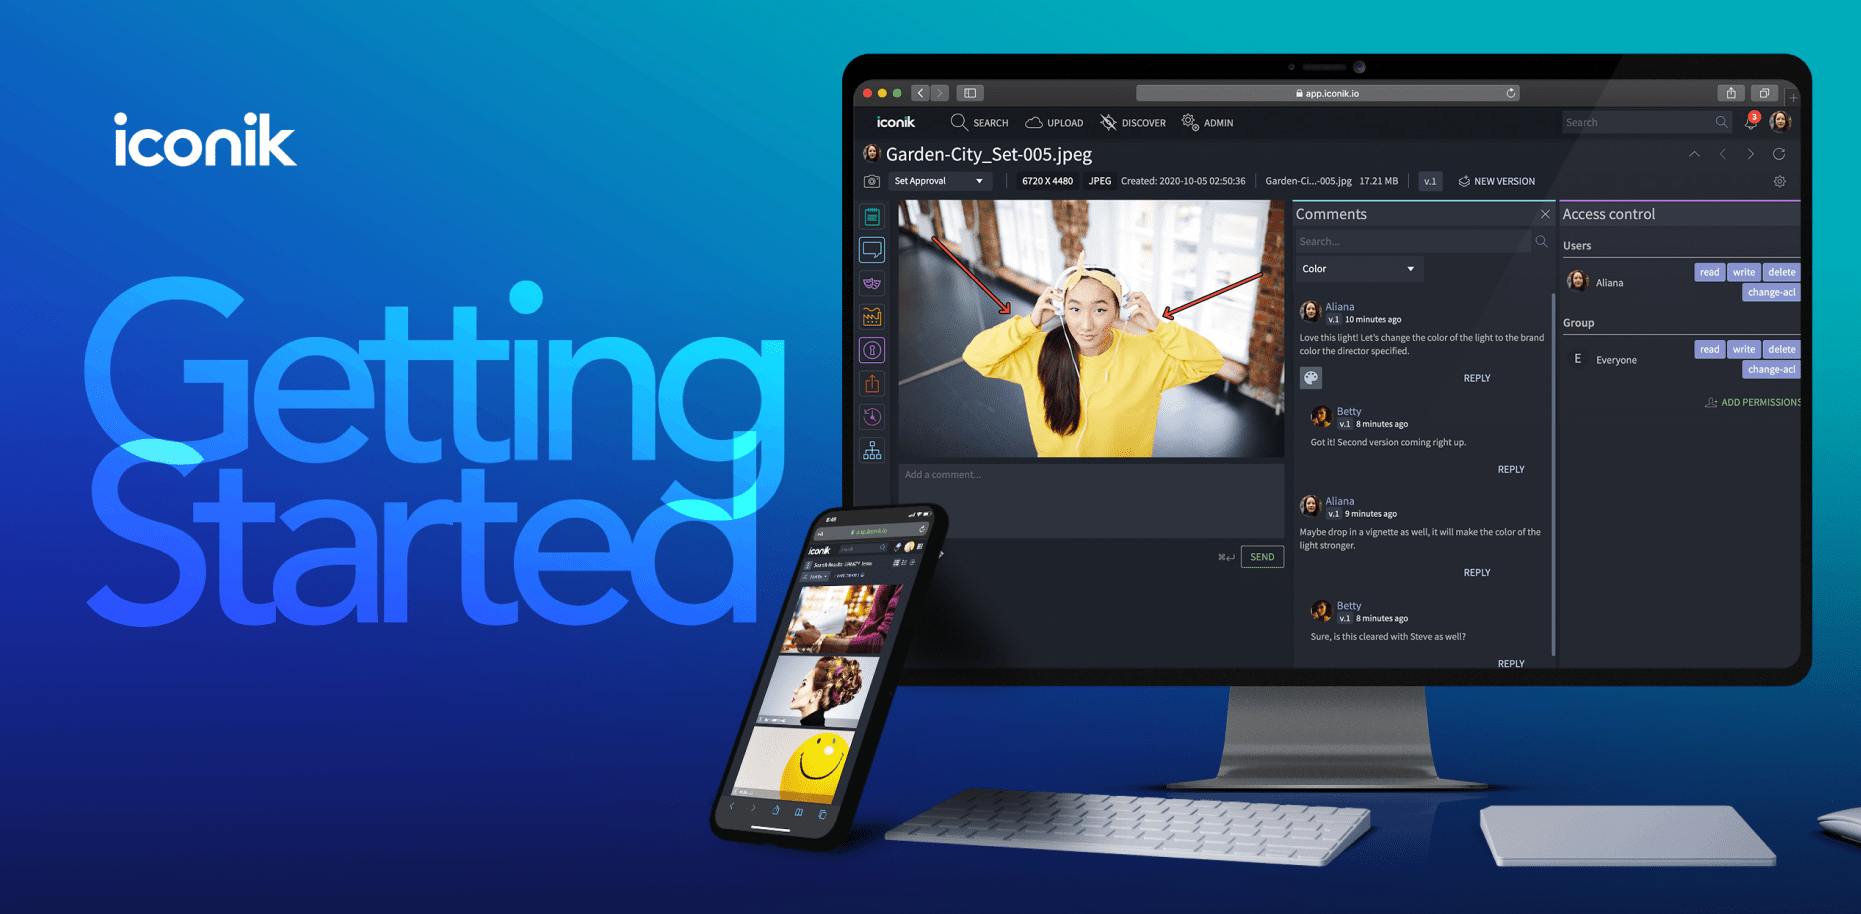
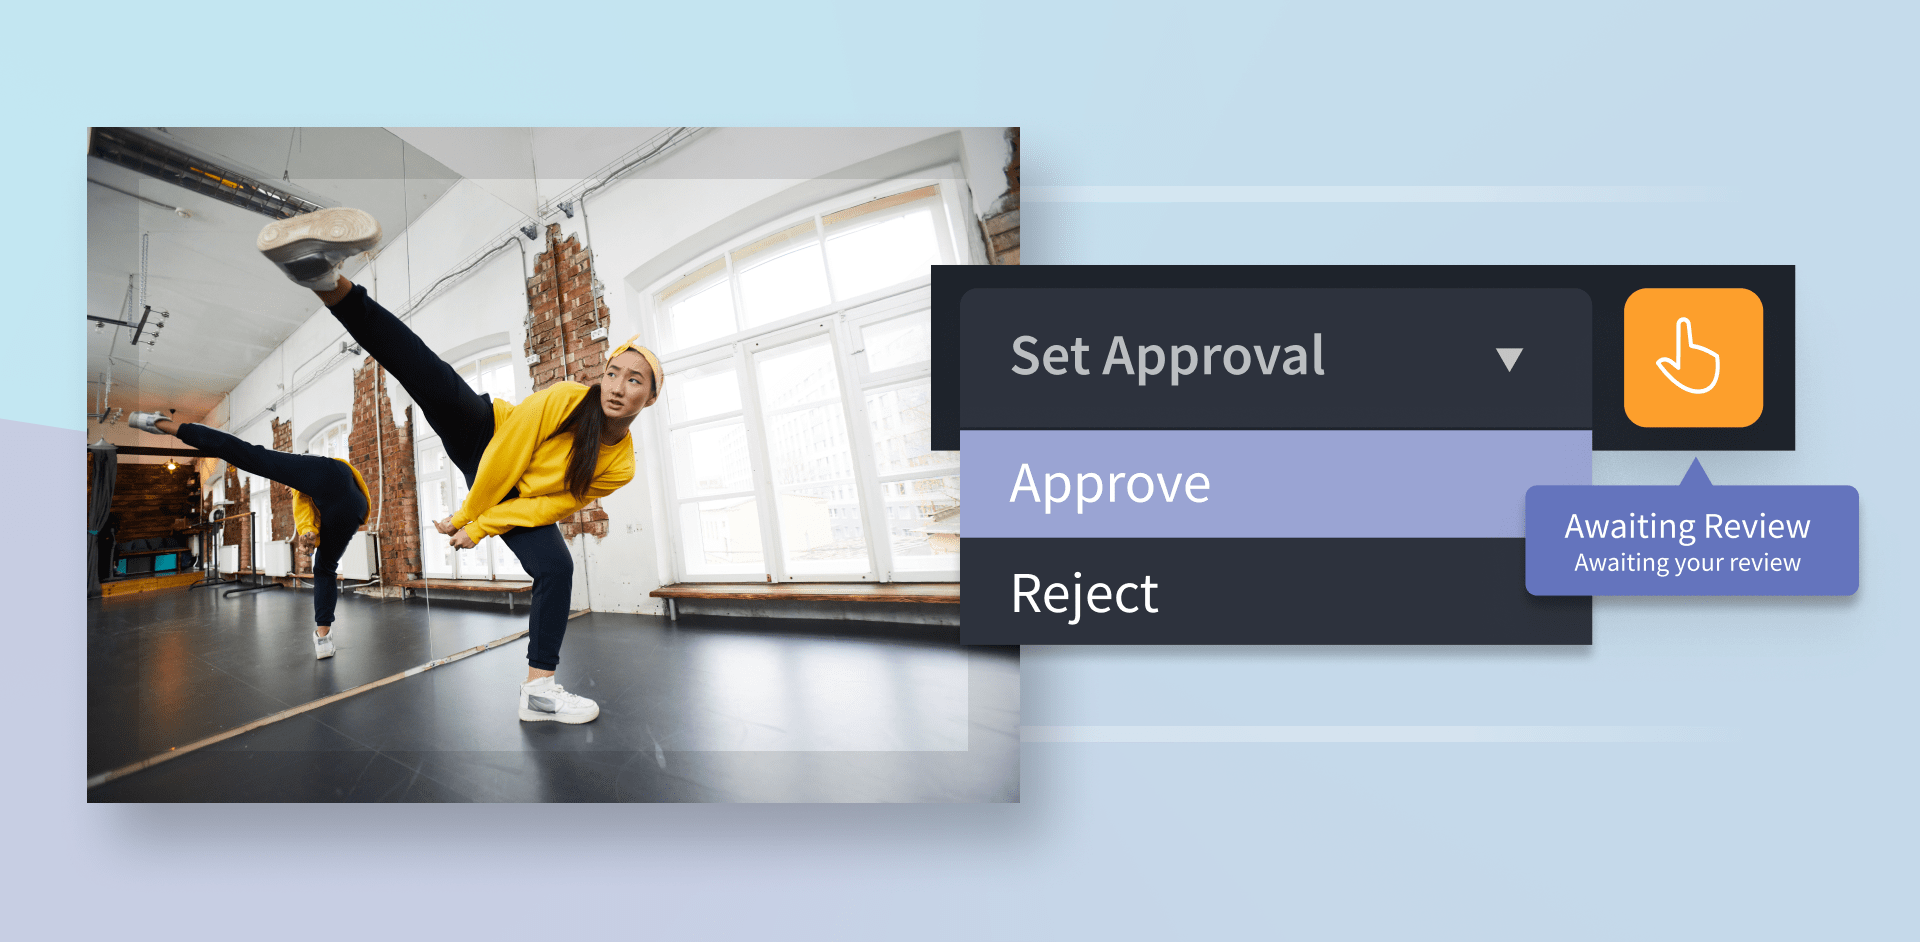
Start a Review and Approve Process
The Review and Approve process in iconik allows you to send a secure link of an asset to others to ask them to review the asset. Anyone you choose can go to the asset to offer comments, visual feedback with draw-on annotations, or set the Approval Status on the asset. Reviewers do not need to have an iconik account.
🏆 Achievement Unlocked!
If you’ve followed this guide up to this point, you have completed everything you need to start.
Now you are ready to move on to explore even deeper.
Good luck! If you need support getting started, our team is always ready to help.