Deploying the code for iconik Hackathon #1 in your domain!
In our first ever live hackathon, we dove into some of the more advanced capabilities in iconik using our API and other modern technologies.
Our goal was to enable a custom workflow where items that are flagged with certain metadata cannot be shared. We also wanted to use a third party messaging app to notify when this restriction occurred.
We were able to build the entire integration from scratch in about two hours using a mix of Google Cloud Functions and Slack’s API, along with iconik’s built in webhooks and API.
If you would like to watch the whole thing, you can watch it here:
Video Markers
00:06:05 Explaining the problem we’re solving with Slack integration.
00:14:54 Creating a webhook
01:07:58 Setting up could functions
01:11:30 Creating a Slack app
01:35:55 Posting data from iconik into Slack
01:55:51 It compiles! Let’s celebrate.
Since the live stream, I’ve gone and made a few very small changes to the code so that any iconik admin can just install this and use it themselves.
Here’s how you can do it.
iconik
The first thing you need to do is grab the code for your cloud function from our Github page
You will first need to do a few things in iconik, Google, and Slack to get this going. Let’s start with what we need to do in iconik. We need to build a metadata field to use as a trigger.
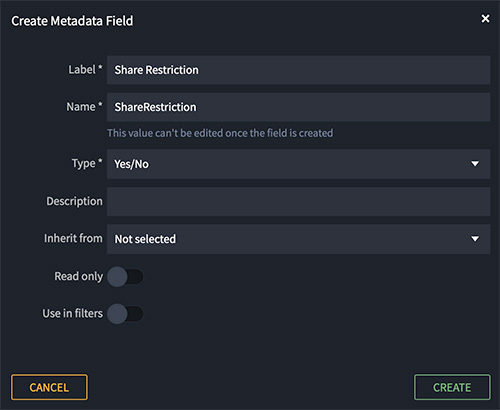
- Log into iconik
- Go to Admin -> Metadata
- Then the Fields tab and create a new Yes/No field:
Once you have added the field, you will need to:
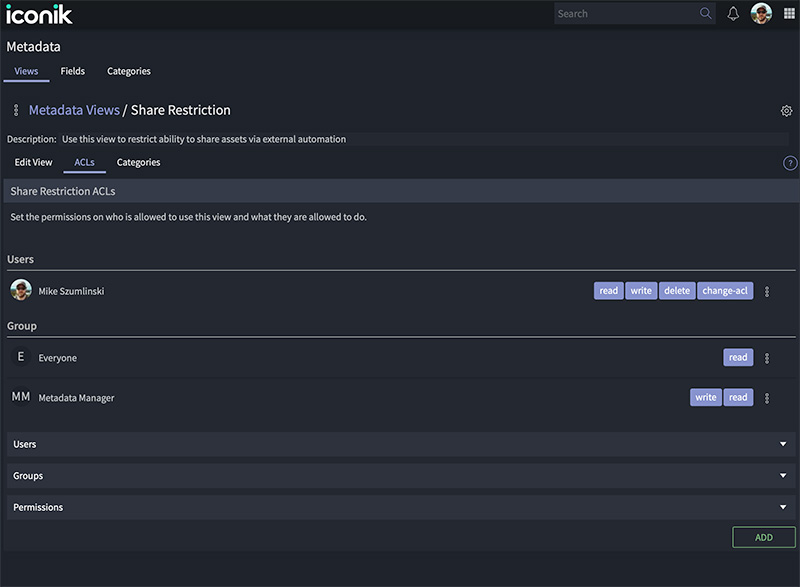
- Go to Admin -> Metadata -> Views
- Make a new view called “Share Restriction”.
- Then add our Share Restriction field to this view.
- Next, you will need to make sure that only users that should be allowed to restrict shares have write permission to this view by clicking on the ACLs tab and configuring appropriately.
Make sure that this view is available in the assets category. Once it is, you can validate by going to an asset as any user with rights to see the view and validate it exists.
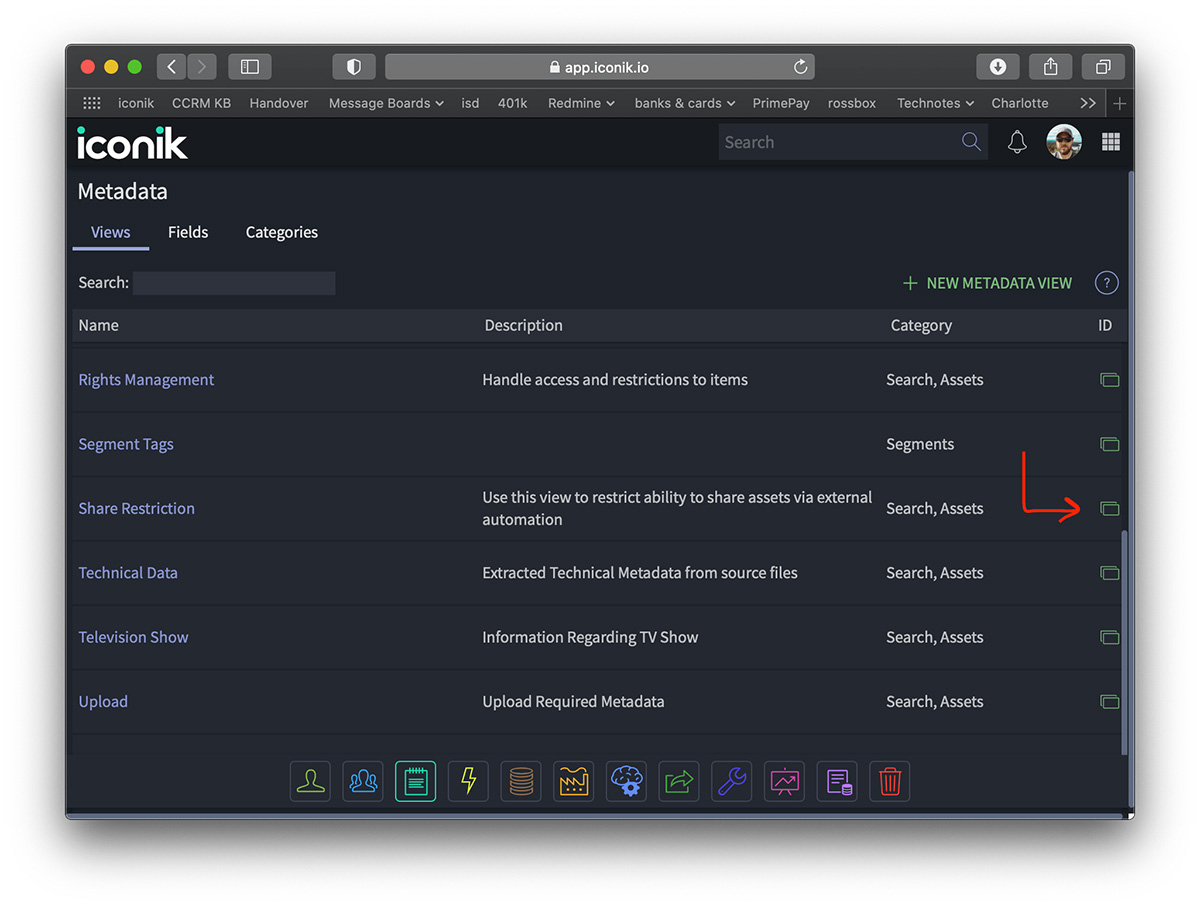
The last thing we need to do with our view is to copy the view ID for use later.
- Go to Admin -> Metadata -> Views
- Click the little box on the right of your view to copy the ID to the clipboard.
- Paste this somewhere and save it for later.
We also need to create a new App-ID and authorization token for talking back with the API. This App-ID should run as a user that has the appropriate roles and ACLs to see/manipulate all assets in the system.
- Go to Admin -> Settings -> Application Tokens to create a new one.
- Then give your new token a name and hit ADD. This will create a new app-id.

Also, click CREATE to get your new token for this app-id.
Remember: This token is only available once from this page, so make sure you copy it and the app-id and paste them somewhere for use later. You won’t be able to get it back once you browse away.

For now, we are done in iconik.
Slack API
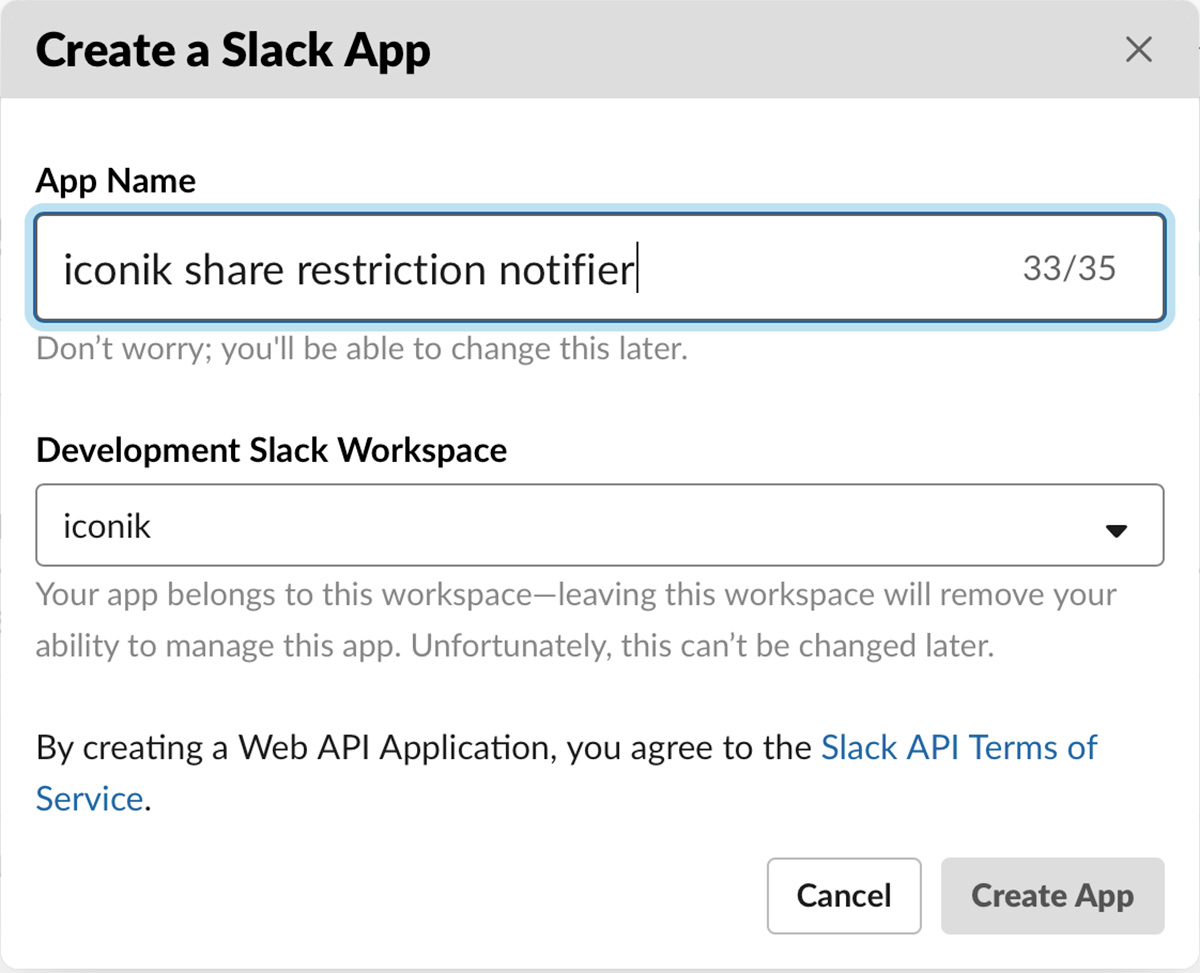
Let’s move on to Slack to enable our app to send messages to a channel. Point your browser to https://api.slack.com/apps and create a new app.
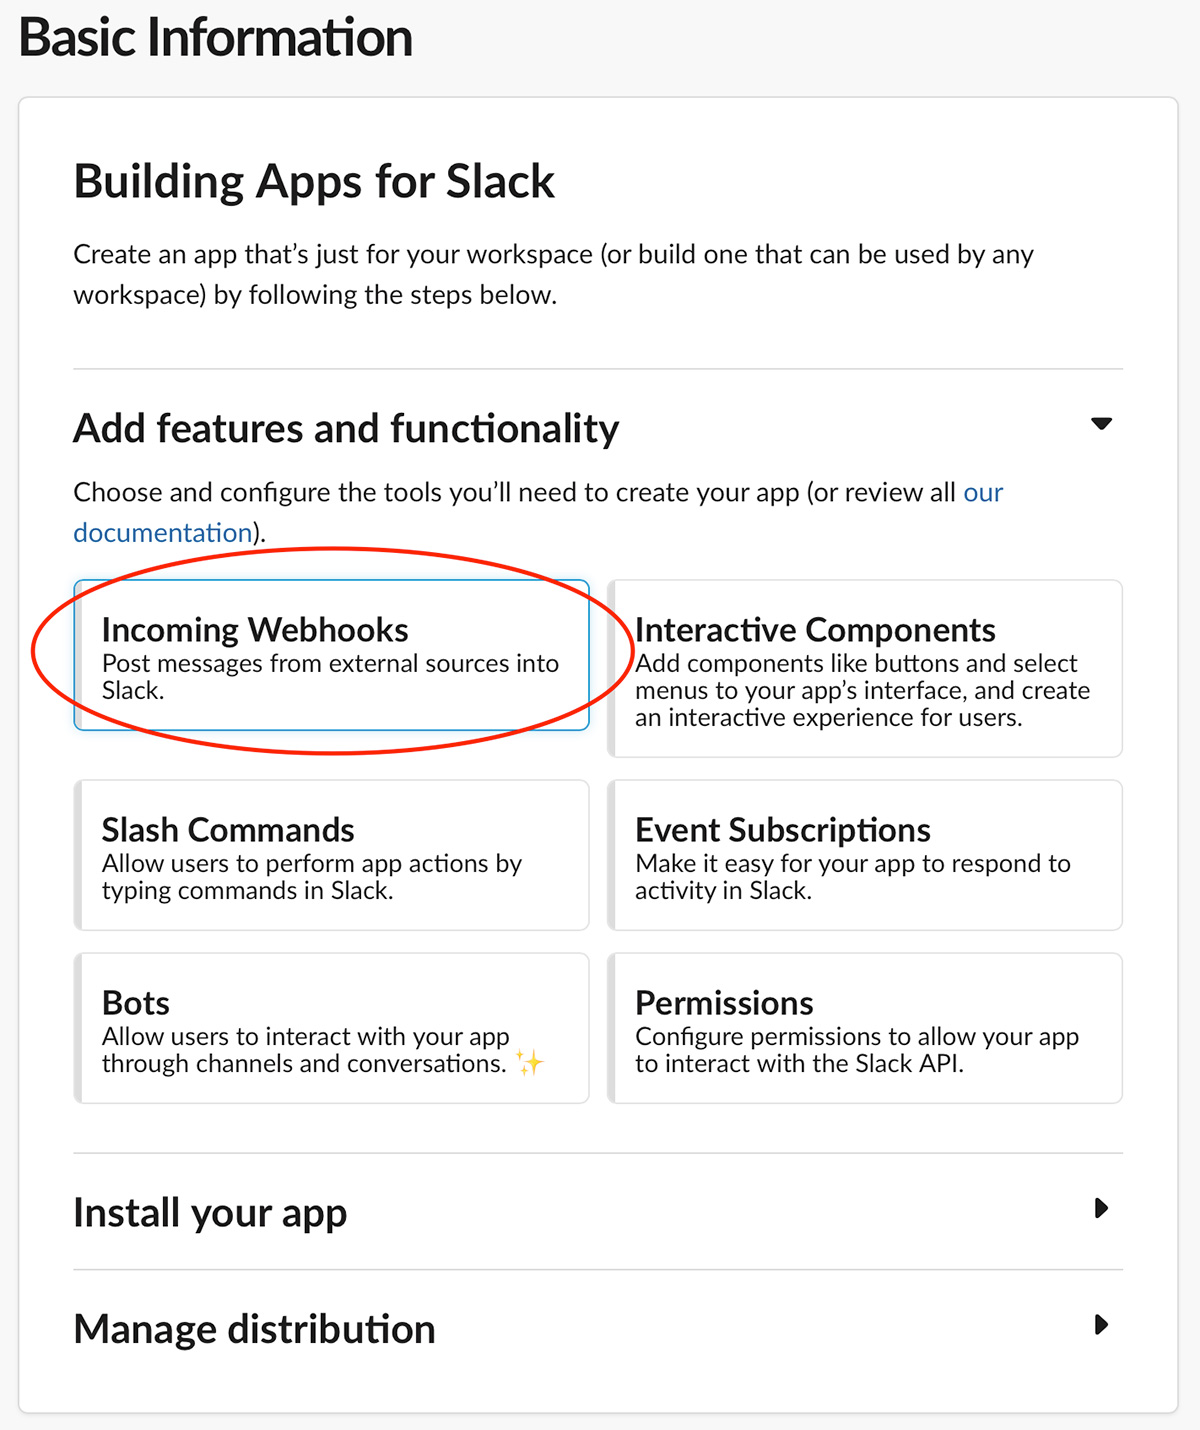
Once you have created the new app, we need to add an incoming webhook feature.
Click “incoming webhooks” on the next screen.
On this screen, you will need to Active Incoming Webhooks first, and then click “Add New Webhook to Workspace”.
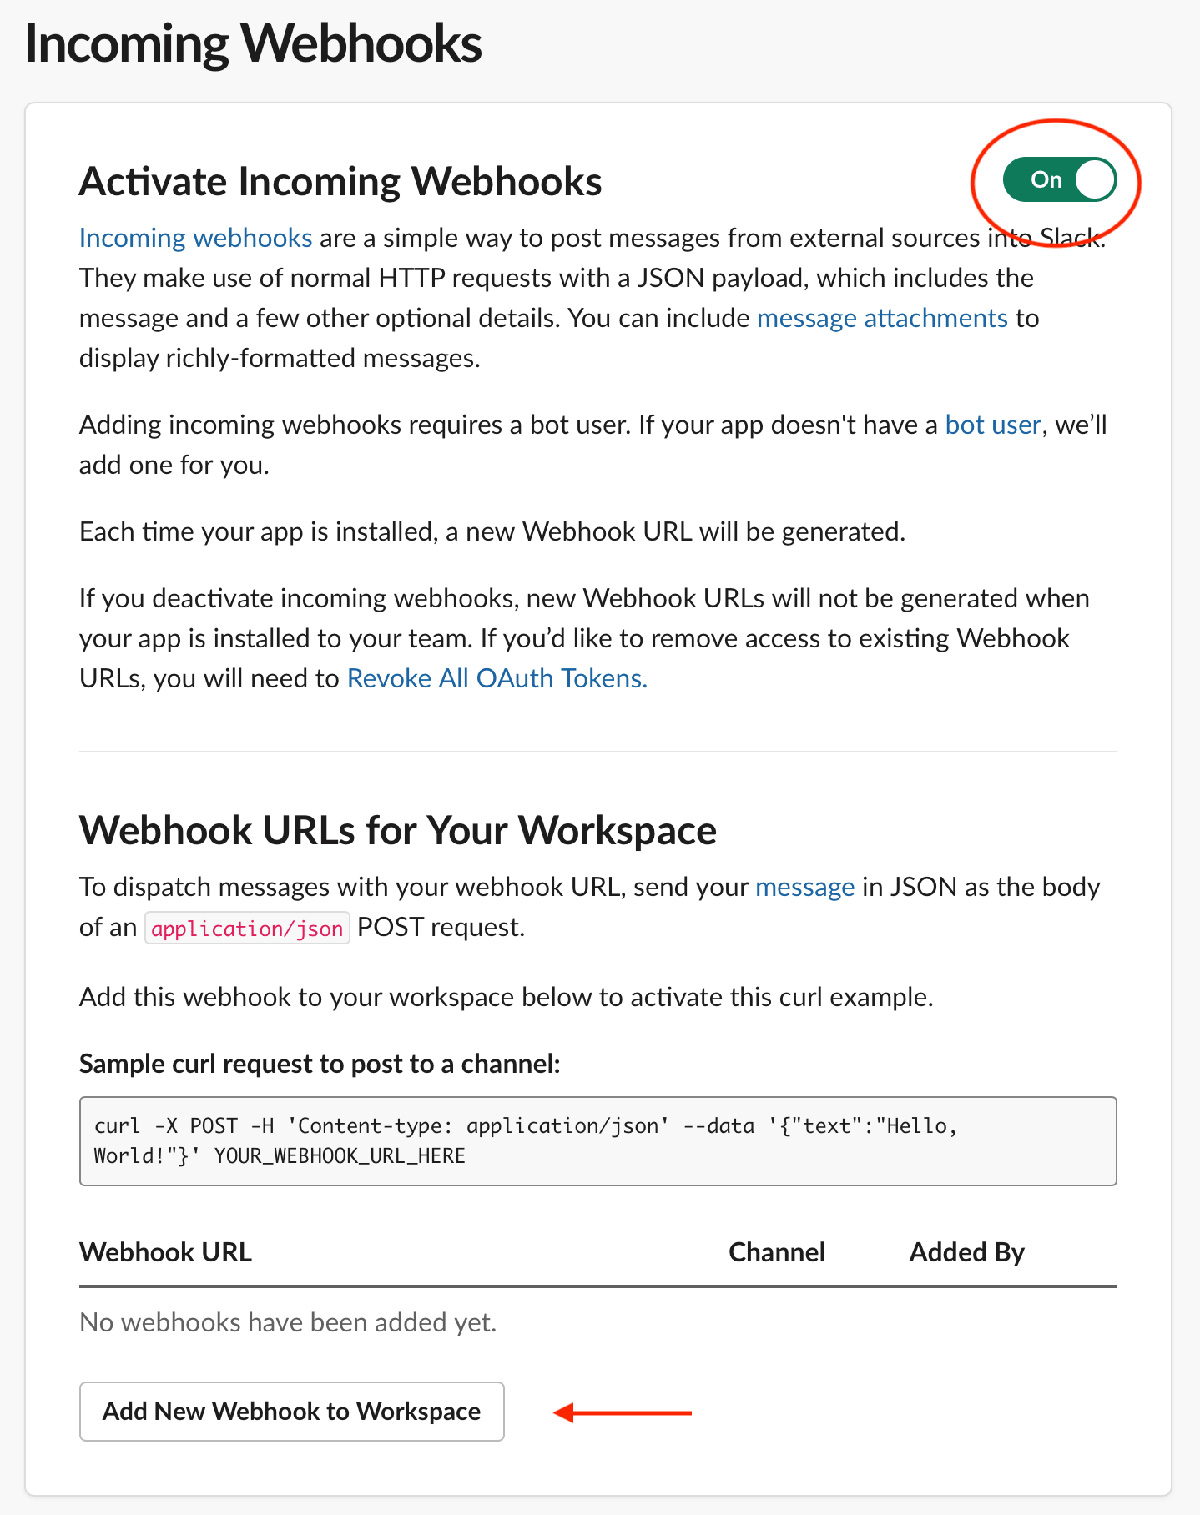
Next, you get to select which channel to post the messages into. Choose the appropriate channel here and hit “allow”.
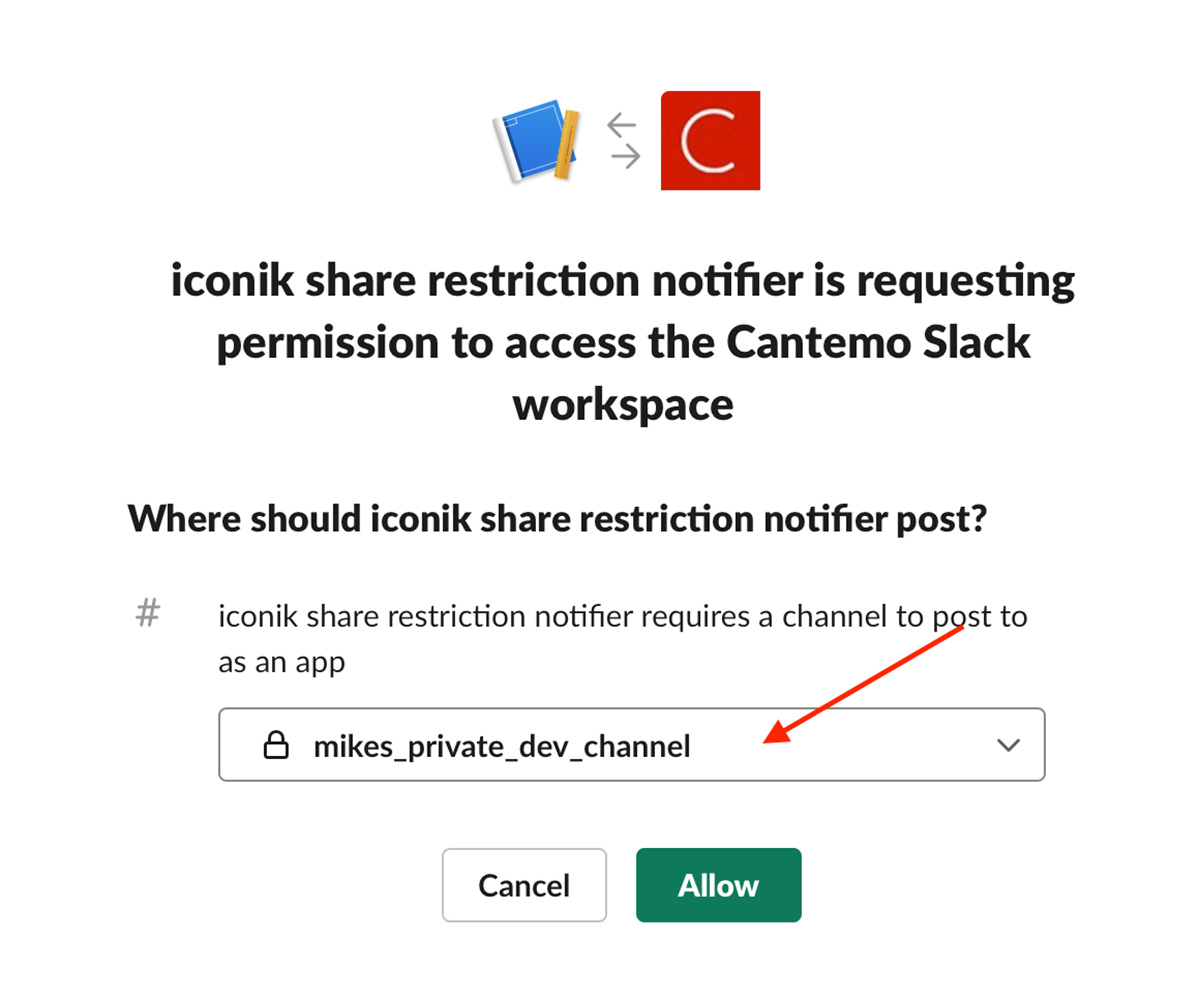
Once this is complete, you will have a Copy button at the bottom of the next screen with the webhook URL for slack. Also, save this for later. We will need it for our cloud function as well.
Now we are done with our setup in Slack.
Google Cloud Functions
Next up, we need to create our Google Cloud function. Log into your GCP account at https://console.cloud.google.com and browse to Cloud Functions from the menu. If you do not have access to cloud functions, you may need to add them to your project or have an administrator for your GCP domain allow you to do this.
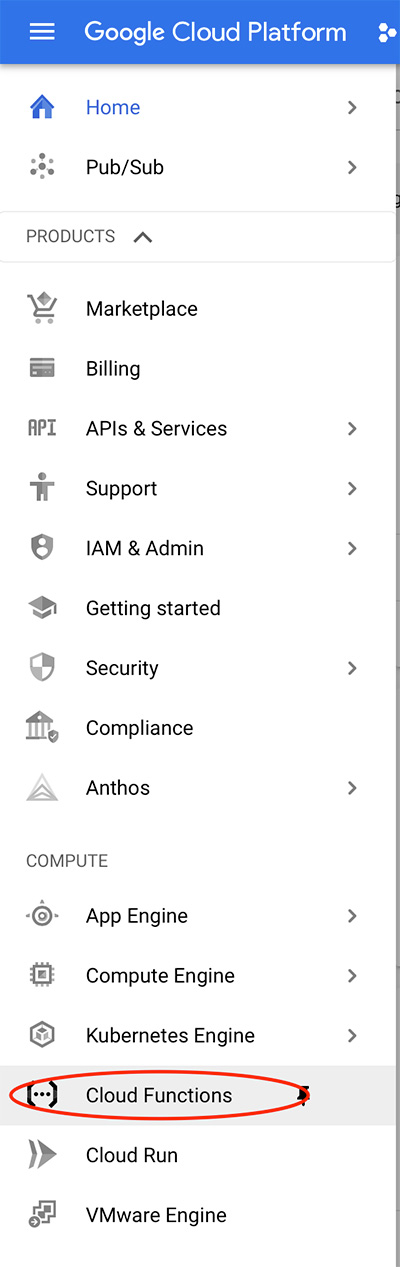
From the Cloud Function menu, we need to create a new cloud function.

On the next screen, we need to do three important things
- Give our function a name (up to you)
- Make sure we allow unauthenticated invocations as iconik does not send auth on webhooks
- Add our variables - these are all the things we copied from the previous steps

Save this and click Next to go to step 2— the code.
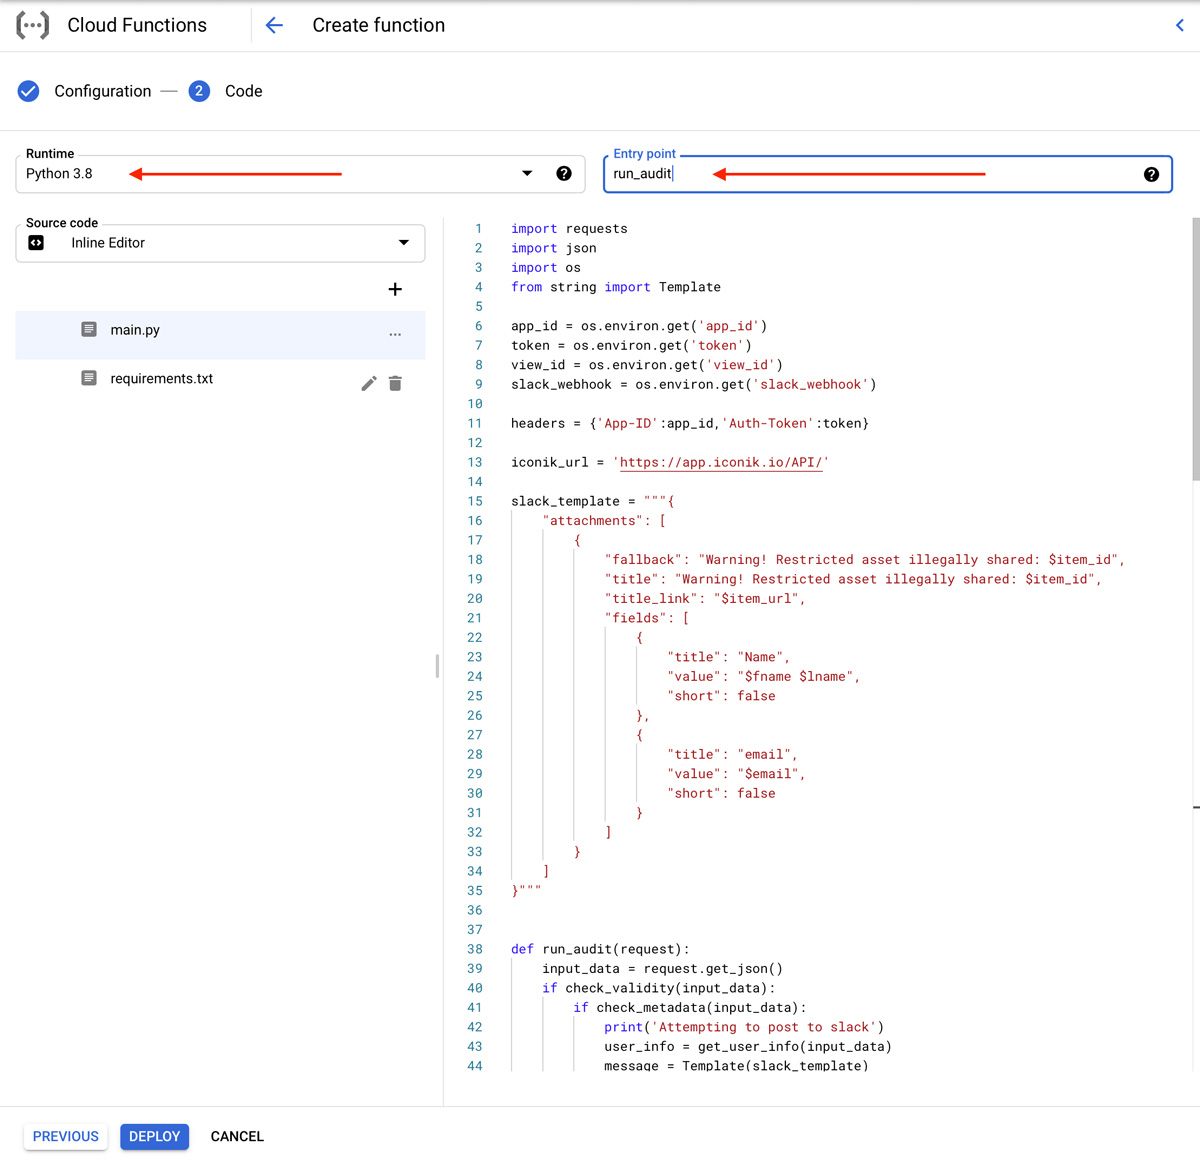
In this view, you will see a few things you need to change
- Make sure the runtime is Python 3.7 or 3.8 (this code will run in either)
- Make sure the entry point is “run_audit” as that is what our function is called in code
- Paste the code into the editor from the “cloud_function.py” script you downloaded from our github
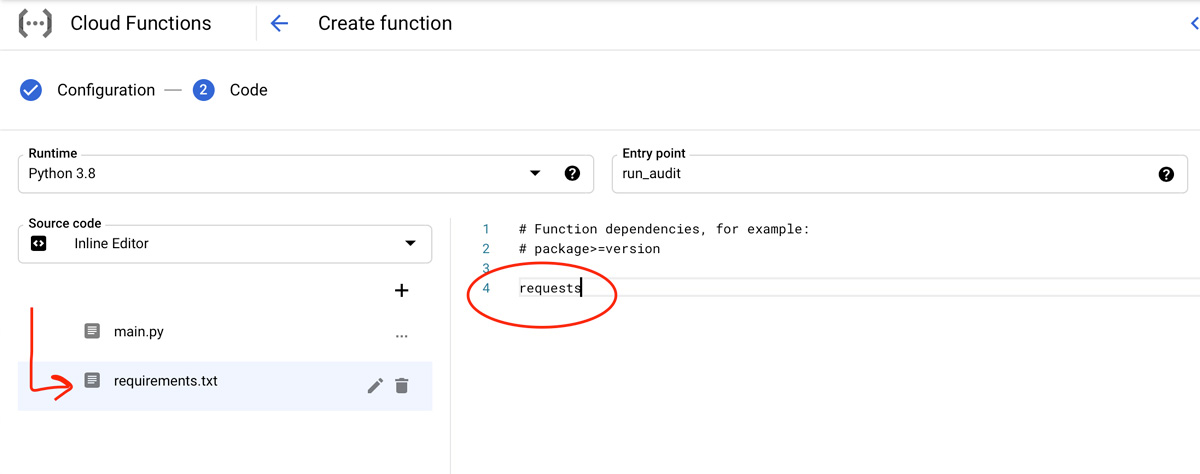
Next, you need to add one line to your requirements.txt doc.
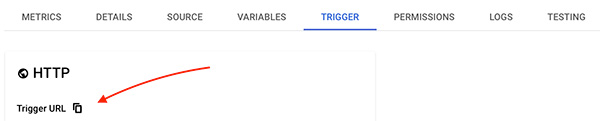
Now hit deploy. This will take a little while to complete, but if you did everything correctly you should get a successful deployment. Click back into the successfully deployed function, click on the trigger tab, and copy your cloud function URL.
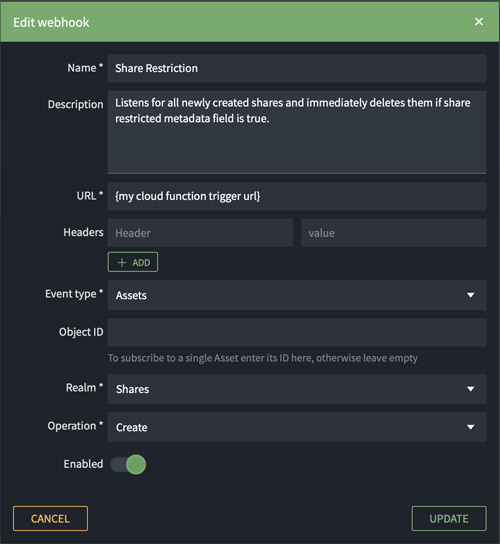
The very last thing you need to do will be to create the webhook in iconik.
- Log back into your iconik domain
- Go to Admin -> Settings -> Webhooks
- We are going to create a new webhook for Type: Assets, Operation: Create, Realm: Shares. This will send a notification to our cloud function every time a share is created and run the code.
- Paste your URL from the previous step into the URL field here and hit ADD
That’s it!
To give it a try:
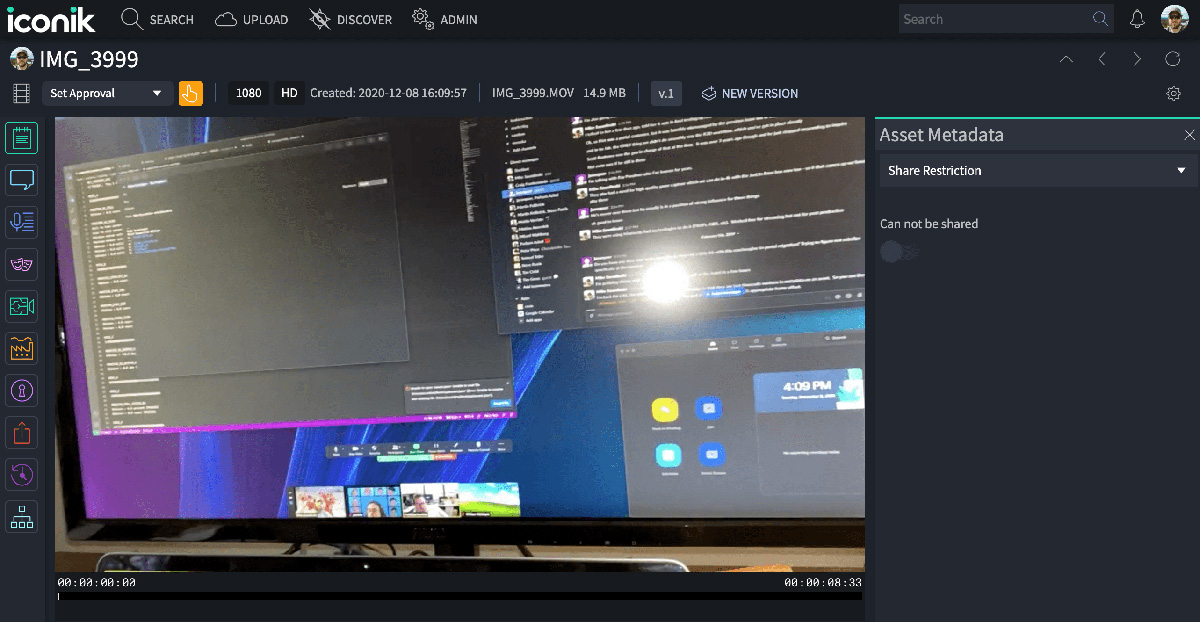
- Go to any asset in your system
- Go to Metadata -> Share Restrictions view
- Enable “Share Restricted”.
- Now share this asset with anyone.
If all is working, you will get a Slack notification shortly after the share is created, and if you refresh the page, you will see the share is deleted.
Also, try doing the same with an asset that doesn’t have this flag enabled. Shares should work as expected!